
Syncing files via iCloud in an app is easy and can be done with a few steps. It syncs a certain directory between devices so that you have the same files available on every device of the same user:
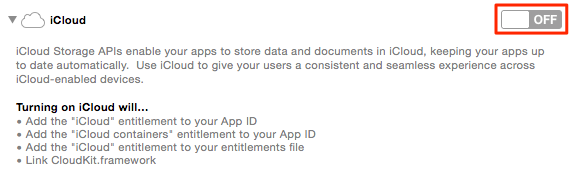
- Turn iCloud support on in XCode for your project. You just have to turn the switch on and turn iCloud Documents on in the next screen that appears.. Afterward the app can use the iCloud and has a directory that is automatically synced between devices.
- To move a local file into the iCloud you just have to move it from a local directory into the iCloud directory using a special command. The sync is performed automatically afterward:
NSError *error = nil;
NSURL *ubiq = [[NSFileManager defaultManager] URLForUbiquityContainerIdentifier:nil];
NSURL *targetDirectory = [ubiq URLByAppendingPathComponent:@"Documents"];
[[NSFileManager defaultManager] setUbiquitous:TRUE itemAtURL:sourceFileURL destinationURL:[targetDirectory URLByAppendingPathComponent:filename] error:&error];
- When reading files from the iCloud you have to take into account that they might not have been downloaded yet. So to read a file from the iCloud you have to trigger a download and then wait for the file:
[[NSFileManager defaultManager] startDownloadingUbiquitousItemAtURL:fileURL error:&error];
NSFileCoordinator *coordinator = [[[NSFileCoordinator alloc] initWithFilePresenter:nil] autorelease];
[coordinator coordinateReadingItemAtURL:fileURL options:0 error:&error byAccessor:^(NSURL *newURL) {
   // Here you can access the downloaded file.
}];
These are the basic steps to use iCloud with files (there are also other options, this here is just a simple way to sync files). However there are some more useful functions:
Listing files
While OS X automatically downloads all iCloud files, iOS doesn’t. So it can happen that you won’t find all available files in the iCloud directory. Instead you have to use a special function to get a list of available files. It is again asynchronous:
self.queryiCloudMetaData = [[[NSMetadataQuery alloc] init] autorelease];
queryiCloudMetaData.searchScopes = @[NSMetadataQueryUbiquitousDocumentsScope];
[[NSNotificationCenter defaultCenter] addObserver:self selector:@selector(refreshiCloudFiles:) name:NSMetadataQueryDidFinishGatheringNotification object:self.queryiCloudMetaData];
[queryiCloudMetaData startQuery];
- (void)refreshiCloudFiles:(NSNotification *)notification {
    [queryiCloudMetaData stopQuery];

    for(NSMetadataItem *item in [queryiCloudMetaData results]) {
       // process the iCloud file item
    }

    self.queryiCloudMetaData = nil;
}
Deleting a file
To delete a file you have to use an NSFileCoordinator to access the file and then an NSFileManager function to delete it:
NSFileCoordinator* fileCoordinator = [[NSFileCoordinator alloc] initWithFilePresenter:nil];
[fileCoordinator coordinateWritingItemAtURL:fileURL options:NSFileCoordinatorWritingForDeleting
 error:nil byAccessor:^(NSURL* writingURL) {
 NSFileManager* fileManager = [[NSFileManager alloc] init];
 [fileManager removeItemAtURL:writingURL error:nil];
}];
Key-Value table
This is an even easier method to sync via iCloud. To save a value into the synced key value table just write
[[NSUbiquitousKeyValueStore defaultStore] setString:@"test" forKey:@"testkey"];
And to read a value write
[[NSUbiquitousKeyValueStore defaultStore] objectForKey:@"testkey"];
The key-value table is automatically synced between all devices that are connected to the iCloud account. To be informed when something changes register an observer:
- (void)registeriCloudKeyValue {
    // register to observe notifications from the store
    [[NSNotificationCenter defaultCenter]
            addObserver: self
               selector: @selector(storeDidChange:)
                   name: NSUbiquitousKeyValueStoreDidChangeExternallyNotification
                 object: [NSUbiquitousKeyValueStore defaultStore]];

    // get changes that might have happened while this
    // instance of your app wasn't running
    [[NSUbiquitousKeyValueStore defaultStore] synchronize];
}
- (void)storeDidChange:(NSNotification *)notification {
    ...
Then you can access the changed keys using
NSArray *changedKeys = userInfo[NSUbiquitousKeyValueStoreChangedKeysKey];
iOS Simulator
To test these iCloud functions with the iOS Simulator you have to sign in to your iCloud account in the “Settings” app of the iOS Simulator. I have tested it with iOS 8.4 and it mostly works, but there are some problems:
- Changes to Key-Value tables seem to be only sent to the iCloud but they are not received.